This is our goal:

Create an expression
Add the element you want bouncing around to your composition
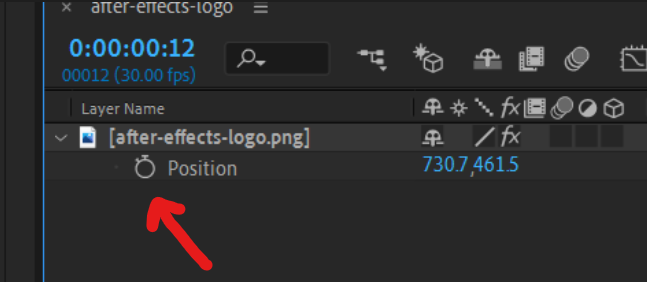
Find the position property (shortcut is P)
Hold Alt/Option and click the stopwatch to create an expression
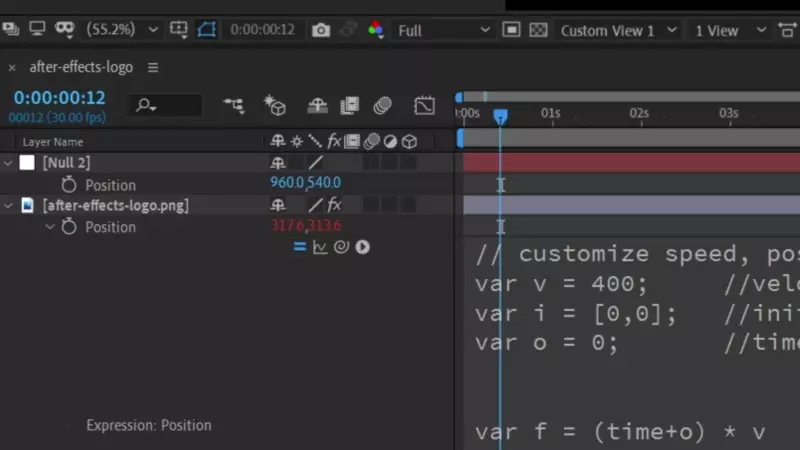
Paste in the code
Copy Paste this code into the expression window that appears
Customize your effect with the first three variables (v, i, o)
// customize speed, position and offset here
var v = 400;     //velocity
var i = [0,0];   //initial position
var o = 0;       //time offset
var fc = 1       //frame count (for spritesheet)

var f = (time+o) * v                  //function
var t = [i[0]+f, i[1]+f];             //time x/y
var d = thisLayer.sourceRectAtTime(); //dimensions
var s = transform.scale;              //scale
var lh = d.height*(s[0]/100);         //layer height
var tlw = d.width*(s[1]/100);         //true width
var lw = Math.floor(tlw/fc);          //layer width
var w = thisComp.width - lw;          //screen width
var h = thisComp.height - lh;         //screen height

// cycle count in x and y
var c = [Math.floor(t[0]/w), Math.floor(t[1]/h)];

// position in cycle for x and y
var p = [t[0] % w, t[1] % h]

//     cycle isOdd ? inversed : original
var x = c[0] %2==1 ? w - p[0] : p[0];
var y = c[1] %2==1 ? h - p[1] : p[1];

var bc = (c[0]+c[1])%fc;   //bounce count
var fo = bc * lw;          //frame offset

[x + tlw/2 - fo, y + lh/2]
Custom start position
Create a null that will hold our starting position and open it's position property.
Select the square brackets and parent it to the nulls position.
Now if you move the Null around at 0 seconds the logo will follow.
Color change on bounce
Since After Effects expressions can not remember state this is tricky.
Start by adding the Color Balance (HLS) effect to the logo.
Same as before add an expression by holding Alt/Option on the effects hue property.
Copy paste this code, where the last part has been altered to work with hue.
Note that this doesn't work with our custom start position! More on this bellow.
// REMEMBER TO MATCH BOTH EXPRESSIONS!
var hueShift = 50; //hue shift
var v = 400;      //velocity
var i = [0,0];    //initial position
var o = 0;        //time offset

var f = (time+o) * v                  //function
var t = [i[0]+f, i[1]+f];             //time x/y
var d = thisLayer.sourceRectAtTime(); //dimensions
var s = transform.scale;              //scale
var lw = d.width *(s[1]/100);         //layer width
var lh = d.height*(s[0]/100);         //layer height
var w = thisComp.width - lw;          //screen width
var h = thisComp.height - lh;         //screen height

// cycle count in x and y
var c = [Math.floor(t[0]/w), Math.floor(t[1]/h)];

var bounces = c[0] + c[1];
(bounces * hueShift) % 360
Keeping both expression in sync
If you change any property in one expression you must do the same for the other!
If initial position is paired to the null for position, it must also be done for Hue.
Pro tip:
Apply the Slider Control effect to your element and rename it to velocity slider.
Pair the velocity property (i) for both expression to the slider, now the speed is always in sync.
Change image on bounce
![]()
⚠️ This is hard to implement and very easy to mess up. ⚠️
I made this at the request of Benedetta Anghileri.
First create an image containing all the logos.
Search spritesheet online for more info, this online tool makes one for you.
Remember that every image needs to be the same size (x, y).
Here is an example spritesheet:
![]()
In the first position expreesion there is a variable for the number of logos/frames in your spritesheet.
var fc = 6 //frame count (for spritesheet)
How to switch between logos
Apply the transition effect Linear Wipe from the effects panel twice (so that you have two).
For the second linear wipe effect change wipe angle to 270.
For the second linear wipe effect create an expression for the Transition Completion variable like so:
// Second (Linear Wipe 2) expression
var fc = 6 //frame count
100-(100/fc)-effect("Linear Wipe")("Transition Completion")
For the first linear wipe effect apply this expression to the Transition Completion variable.
// First (Linear Wipe) expression
// REMEMBER TO MATCH VARIABLES FOR ALL EXPRESSIONS!
var v = 400;     //velocity
var i = [0,0];   //initial position
var o = 0;       //time offset
var fc = 6       //frame count (for spritesheet)

var f = (time+o) * v                  //function
var t = [i[0]+f, i[1]+f];             //time x/y
var d = thisLayer.sourceRectAtTime(); //dimensions
var s = transform.scale;              //scale
var lh = d.height*(s[0]/100);         //layer height
var tlw = d.width*(s[1]/100);         //true width
var lw = Math.floor(tlw/fc);          //layer width
var w = thisComp.width - lw;          //screen width
var h = thisComp.height - lh;         //screen height

// cycle count in x and y
var c = [Math.floor(t[0]/w), Math.floor(t[1]/h)];

var bc = (c[0]+c[1])%fc;   //bounce count

(bc/fc) * 100
Remember to match the variable fc for all the 3 (position, wipe 1, and wipe 2) expressions!
I know there are many steps to making this work, but i couldn't find any simpler ways to implement spritesheets.
If you have more experience in After Effects expressions please comment with an easier way to do this.
When does it perfectly loop?
Click this link for a CodePen with some javascript code that finds the next loop frame and a timestamp. You will need to manually put in your data points so it isn't perfect. Unfortunately i couldn't find an easy way to do this in After Effects because it crashes. If anyone knows a way to run a resource intensive expression once please share!
Enjoy the nostalgia
Now you have your very own bouncing logo effect, taste that sweet sweet nostalgia!.